
Matrix Effect Tutorial
By EnterTheFenix
By EnterTheFenix
This tutorial will teach you how to take an ordinary picture, and convert it to a 'Matrix' version of it. The picture, in other words, will consist of the matrix code and ends up really looking cool. I will cover such techniques as displacement mapping, layers and the free transform tool.
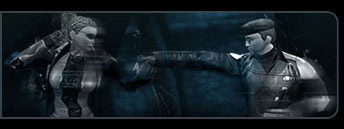
Step 1: Find an image you want to edit. I'll use this one.

Step 2: Find a nice and large matrix code picture. I'll save you the trouble of looking. (Matrix Code Picture)
Step 3: Open your starting image. It should be the background layer. It is a good idea to keep this layer untouched so that you can refer back to it or copy bits from it and what not.
Step 4: Create a new layer called 'Code'. Paste the matrix code image so it fills the screen. Duplicate the background layer and put it on top of the other two layers. Name that new layer 'Lines'.
You now should have 3 layers. 'Lines', then 'Code', then your original background picture.
*** Note, before you continue, copy & paste your original Background image, and save it by itself into it's own .psd file. You will need to do this for the next steps. Save it as ImageDisplace.psd ***
Step 5: Ok now that you have done that go back to the original psd that has the 3 layers. Select the 'Code' layer and then from the menu go Filter > Distort > Displace. Use these settings:
Horizontal Scale : 30
Vertical Scale: 30
Select Stretch To Fit & Repeat Edge Pixels
(You may want to use a smaller value than 30 for the scale. 20 or even 10 often works well. I used 10 for this picture.)
Step 6: Now click and Select the image you saved as ImageDisplace. The image of the code should distort slightly.
Step 7: Go to the layer ‘Lines’. Go Filter > Stylize > Glowing edges. Play around with the settings until you’re happy and click OK.
Step 8: Then go Image > Adjustments > Hue / Saturation.
Step 9: Check the box ‘Colorize’ and make it green and about the same saturation as the code.
Step 10: Set the layer blend mode to ‘Screen’ and admire the effect!
Step 11: To make it look a bit more real, select (on the code layer) the bits of code corresponding to each wall and go Edit > Transform > Perspective. Grab a corner handle and drag.
And tada! This is the final effect
 . If you have any questions on any part, please feel free to ask me anything.
This picture was not the BEST example to use since it did not have much depth. I'll post a few more in a bit. Let's see what you guys can do!!! I'm positive you guys will get better results. I'm not pro pro at Photoshop, but my picture still turned out pwn!
 .
.