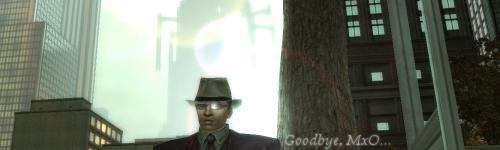
I haven't seen many good tutorials on how to touch up an image on The Gimp, so I thought I might as well create one. I'll be using the Gimp photo-enhancing program, along with a few scripts you can grab off their site. (all free) I'll only be using scripts for today for the sake of time. To start with, you'll need a base image. The good thing about the Gimp is all the scripts you can download for it, it makes enhancing a photo a lot easier. To start, first open up your base image, I'll be using a character screen capture I took using FRAPS.
Your first step in touching up any good white balanced photo, is to use a dodge and burn script, to give the image a more 3-d feel. I use the standard 5/25 setting, on my script.
Remember to Merge your layers, else the scripts will not work to your demands. Next, you'll be using another downloadable script for the gimp, called Sharpen Smart Redux. Again, don't bother setting any of the settings on these, unless you know what you're doing. Don't bother on your first time around, So I'll use my standard settings for the sake of the tutorial.
If you merged your layers correctly before you used Sharpen Redux, it should look more realistic, now. I'm going to go ahead and use the built-in Anti-Alias tool to bring some of the aliasing off the image.
Your image should look alot less jagged around the edges, now. If not, feel free to go in and use a blur tool on any residual alising, such as on Hairlines in MxO.
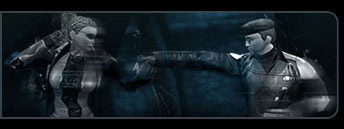
Last, put any finishing touch on that you desire. I usually use a softglow, and/or video distortion.
Once you put that last (custom) touch on, you're finished. Enjoy your finished image, and bask in its glory. Don't forget to save your file as a GIF, otherwise, Quality may be diminished.
Gimp downloads.
Gimp scripts.
Before:
After:
Your first step in touching up any good white balanced photo, is to use a dodge and burn script, to give the image a more 3-d feel. I use the standard 5/25 setting, on my script.
Remember to Merge your layers, else the scripts will not work to your demands. Next, you'll be using another downloadable script for the gimp, called Sharpen Smart Redux. Again, don't bother setting any of the settings on these, unless you know what you're doing. Don't bother on your first time around, So I'll use my standard settings for the sake of the tutorial.
If you merged your layers correctly before you used Sharpen Redux, it should look more realistic, now. I'm going to go ahead and use the built-in Anti-Alias tool to bring some of the aliasing off the image.
Your image should look alot less jagged around the edges, now. If not, feel free to go in and use a blur tool on any residual alising, such as on Hairlines in MxO.
Last, put any finishing touch on that you desire. I usually use a softglow, and/or video distortion.
Once you put that last (custom) touch on, you're finished.
Gimp downloads.
Gimp scripts.
Before:
After:
†Somnolence - CYPH† Blue is our best hope.

 "The End is Near, the Time is Now." | W4rbl4de | Reviled Restoration-CYPHERITES