Photoshop Tutorial: phi's BulletTime(tm) ripple effect
The version of photoshop used for this tutorial is CS (Windows XP). These features work pretty much the same in 5.5, CS2 and CS3.
Mac users will have to tranlate the commands to mac-ish ... Not hard but I don't have a Mac so I don't know the option-apple-clover malarky. 
This tutorial will attempt to teach you how to turn this:
Archived image unavailable: album_thumbnail9b3d.html
01.jpg
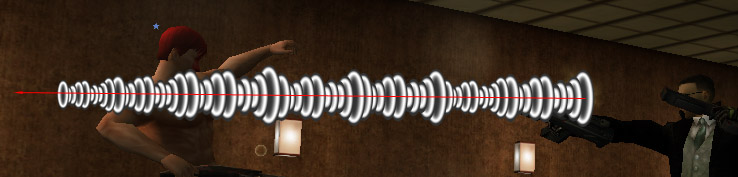
into this:
Archived image unavailable: album_thumbnailcaa0.html
25.jpg
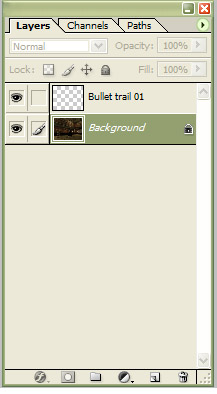
First, open your image that you wish to add the effect to and make a new layer called Bullet Trail 01 (if you are making bullet trails it gets messy and naming is important)
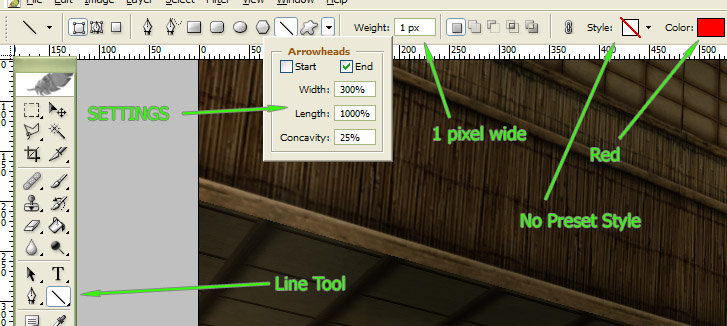
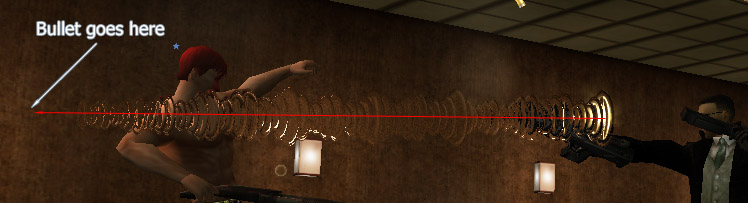
Select the Line tool and chose a colour that will stand out (for this image I have chosen red, I recommend a different colour for each trail in your image)
Then set the Line tool to 1 pixel wide, with an arrow head at the end. It is important to check that the Line tool isn't using a preset style as this will override your settings.
Select the Bullet Trail 01 layer we made earlier and draw the path of the bullet with the line tool as shown (I've started my bullet trail where the muzzle flash is and angled it based on the way the gun has kicked back)
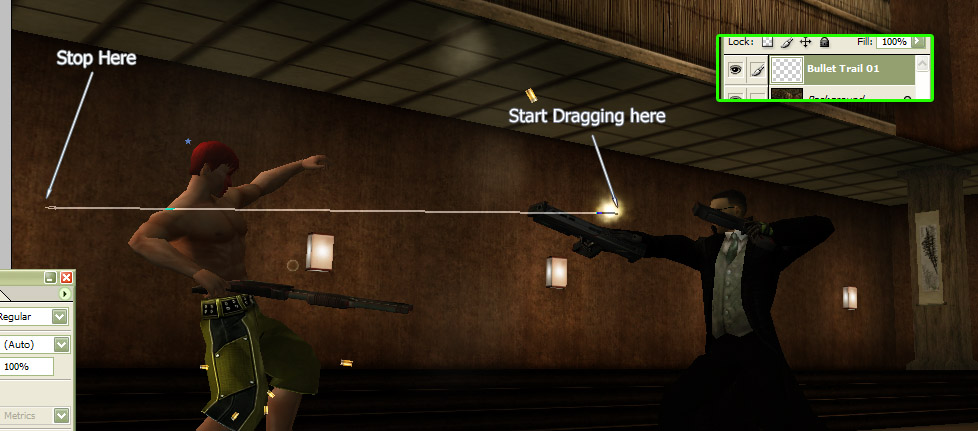
You should end up with something like this:

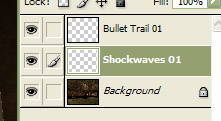
Make a new layer BEHIND the Bullet Trail 01 layer and call it Shockwaves 01
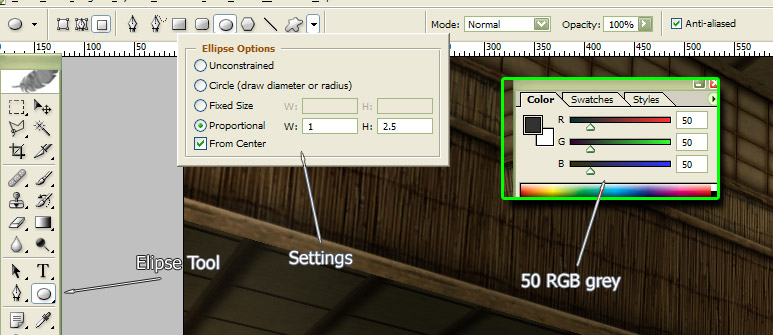
Set your foreground colour to RGB:50,50,50 (grey). Select the Elipse tool and set it to From Center (holding the alt key when drawing also does this if your version doesn't have this feature). Setting the Elipse Tool to proportional makes things faster and your work more consistent. Ther ratio to use depends on the angle the bullet path makes to the viewer. If the bullet is travelling directly towards you or away from you the circles would look almost round so the ratio should be close to W:1 H:1. If the bullet travelled across the screen in front of you the circles would appear quite squished and the height should be more than the width. In this case I have set the height to 2.5 times the width. Use your judgement and with practice you will be able to get this right easily.
At the start of the bullet path but on the Shockwave 01 layer draw your 50-gray elipse with the centre on the bullet trail.
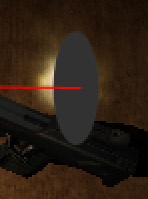
Next edit the layer properties and turn on Inner Glow, set it to white with the settings shown (make sure you chose the hump contour, as shown, to make a ring):
Archived image unavailable: album_thumbnail00e3.html
10.jpg
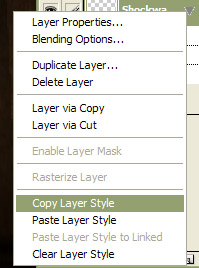
Right-click the Shockwave 01 layer and copy the layer style for later use.
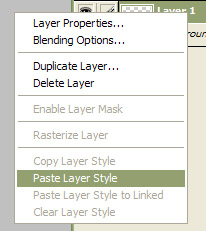
Make a new layer IN FRONT of the Shockwave 01 layer but BEHIND the Bullet Trail 01 layer and paste the layer style you just copied on it.
Now draw a new elipse a bit further along the bullet trail on the new layer and you should have something like this:

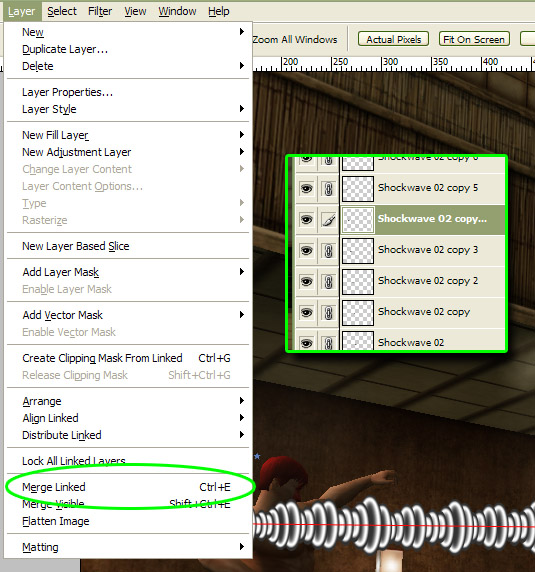
Repeat the above process, varying the elipse sizes as you go (I've made them a little big for this tutorial so you can see the details. Look at the movies and the bullet trails are thinner). Every now and then when you are getting too many layers, select the Shockwave 01 layer (the selected layer gives it's name to the new merged layer) and then link the other elipse layers to it. Then merge the linked layers. This prevents the layer style going ugly.
As you get nearer the bullet make the elipses smaller as these shockwaves were made more recently and haven't had time to spread much yet.
You should end up with something that looks like this:
Now, right-click the merged final Shockwave 01 layer and duplicate it to a new image and call the new image BT Ripple 01.
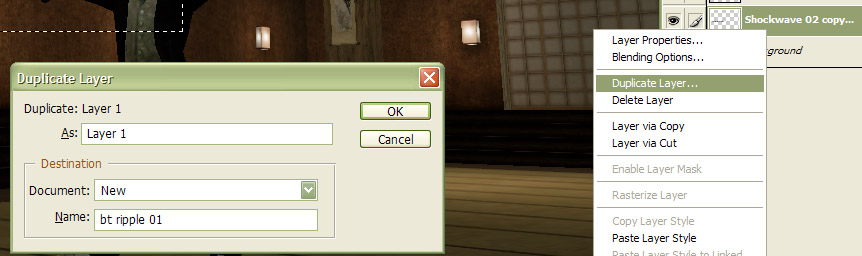
In the new image add a layer of black BEHIND the shockwave layer. DO NOT resize this image, it MUST be the same size as the image you are working on.
Archived image unavailable: album_thumbnailc995.html
016.jpg
Flatten this image and save it as BT Ripple 01.psd then close it.
Back in your original image, duplicate the background as a new layer (or whatever layer your original image is on) so we don't damage the working image.
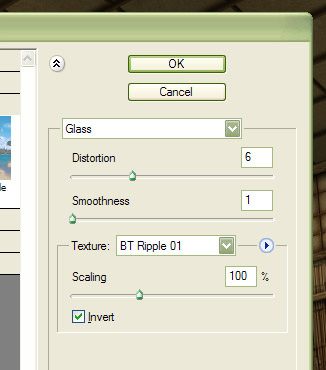
Select the new layer and open the Distort > Glass filter
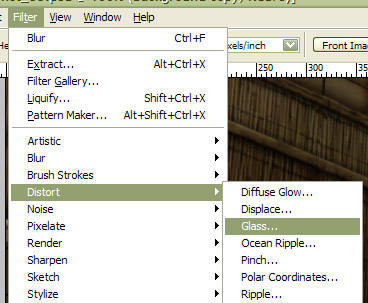
Load the image BT Ripple 01.psd as the texture and set the filter setting as shown: (scale MUST be 100% or the ripple will be in the wrong spot and the wrong size)
It will produce a result like this:
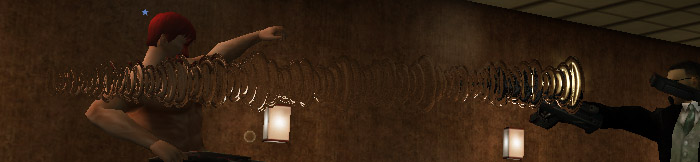
Almost there... but we can't quite see the ripples.
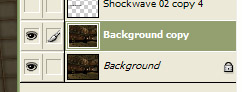
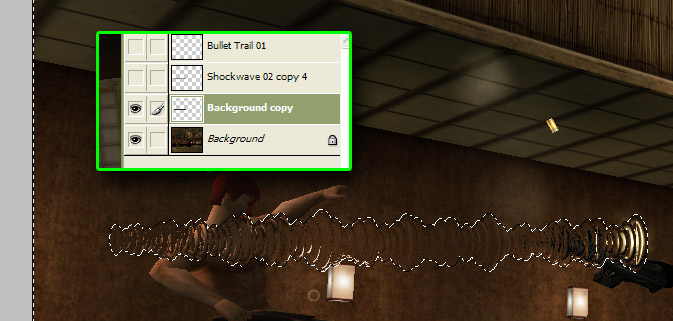
Select the Shockwave 01 layer and load it's inverted selection (ctrl-click the layer then press ctrl-shift-I or use the menus as shown)
Archived image unavailable: album_thumbnail42bb.html
21.jpg
Now select the layer with the glass distortion and press the Delete (Del) key on your keyboard. That will remove everything in the selected area (everything except the ripples)
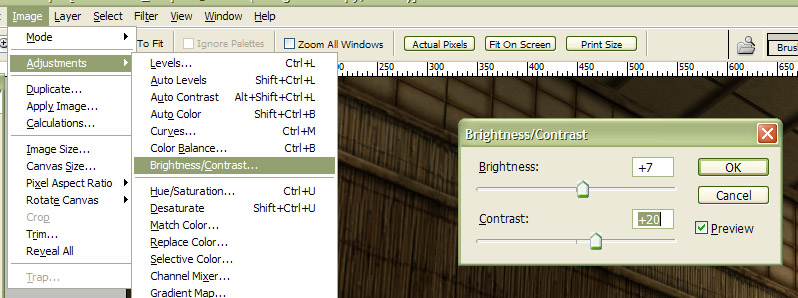
Adjust the layer's brightness and contrast slightly to make it a little more visible.
Don't forget to draw your bullet where the arrowhead on the bullet trail line is
All done! (Except I didn't bother with a bullet this time)
Archived image unavailable: album_thumbnailcaa0.html
25.jpg
Here's one I made earlier: