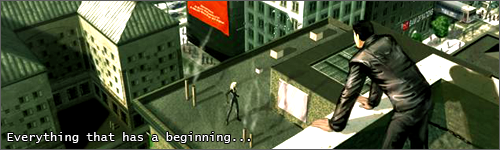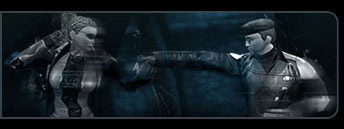
So how 'bout them tutorials eh? I bring you the method behind the madness and all that jazz. A lot of what I do is techniques used by other people, but a little differently, and a lot of what I do is weird stuff that I came up with on the fly. Today we'll be working with a photo of Gryn helping old ladies walk across the street. So let's get our Photoshops ready and play! First off we start with our image.

It's a little big though isn't it. Let's try resizing that shall we? When I'm editing a screenshot to turn it into a signature I always drop the resolution of the entire image to 800x600. Now that that's done we have a much smaller canvas to work with, and also a lot of the teeny tiny jagged artifacts are smoothed out a little more. Now what we want to do is duplicate our background layer. Once we've done that we're ready to start editing. The first thing I do when I'm editing an image is I adjust the brightness and contrast so that things we couldn't normally see are more visible.

Depending on the native brightness of the image, I usually choose a brightness of 15, and a contrast of 10 like so.

Once that's taken care of I make the copy of the background layer the only layer that's visible, this helps to see what you're doing in this next step. Now, let's pick our eraser tool and start carefully removing the focus of the image. In this case the focus of the image is Gryn, and the nice old lady he's helping across the street.

Yay now that the boring and redundant part is over we can get to the good stuff! What we're going to do now is click on Filter/Blur/Gaussian Blur. I do a ratio of 2.5 typically.

Once we've applied the blur, go ahead and make the background layer visible again. Now we're going to add some depth perception to the image. Click your eraser tool, and pick a large soft brush in the drop down menu. I use 100. Now we're going to run the eraser across the foreground and begin to add depth to the image.

This is pretty much done to taste. I use 100% opacity in the foreground, and the farther back I get I decrease the opacity in quarters like this.

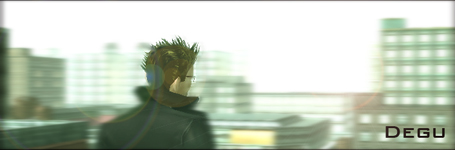
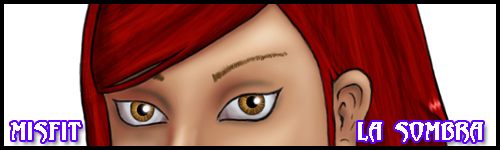
Once your image has some depth to it, let's go ahead and merge the two layers that we have right now. The first thing I do once the image is flattened is adjust the levels. This is also pretty much just done to taste, but I generally lean more towards blue since it balances out the harsh green of everything within MxO and really cools down the image.

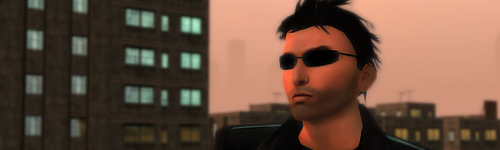
Now we're almost done, the final step in this is adding the photo filter, which I always add to my images. I use the Sepia preset. Adding the Sepia filter generally puts all the colors of the image into balance.

And I usually end up with something that looks a little better, but the only .BMP I had after cleaning my harddrive was a picture I took with that stupid overbright filter on, which always throws an image off kilter in my opinon, but this is the finished product.
Original

Enhanced

Hope you enjoyed my little tutorial and I hope it inspires new and creative MxO screenshot editing.
It's a little big though isn't it. Let's try resizing that shall we? When I'm editing a screenshot to turn it into a signature I always drop the resolution of the entire image to 800x600. Now that that's done we have a much smaller canvas to work with, and also a lot of the teeny tiny jagged artifacts are smoothed out a little more. Now what we want to do is duplicate our background layer. Once we've done that we're ready to start editing. The first thing I do when I'm editing an image is I adjust the brightness and contrast so that things we couldn't normally see are more visible.
Depending on the native brightness of the image, I usually choose a brightness of 15, and a contrast of 10 like so.
Once that's taken care of I make the copy of the background layer the only layer that's visible, this helps to see what you're doing in this next step. Now, let's pick our eraser tool and start carefully removing the focus of the image. In this case the focus of the image is Gryn, and the nice old lady he's helping across the street.
Yay now that the boring and redundant part is over we can get to the good stuff! What we're going to do now is click on Filter/Blur/Gaussian Blur. I do a ratio of 2.5 typically.
Once we've applied the blur, go ahead and make the background layer visible again. Now we're going to add some depth perception to the image. Click your eraser tool, and pick a large soft brush in the drop down menu. I use 100. Now we're going to run the eraser across the foreground and begin to add depth to the image.
This is pretty much done to taste. I use 100% opacity in the foreground, and the farther back I get I decrease the opacity in quarters like this.
Once your image has some depth to it, let's go ahead and merge the two layers that we have right now. The first thing I do once the image is flattened is adjust the levels. This is also pretty much just done to taste, but I generally lean more towards blue since it balances out the harsh green of everything within MxO and really cools down the image.
Now we're almost done, the final step in this is adding the photo filter, which I always add to my images. I use the Sepia preset. Adding the Sepia filter generally puts all the colors of the image into balance.
And I usually end up with something that looks a little better, but the only .BMP I had after cleaning my harddrive was a picture I took with that stupid overbright filter on, which always throws an image off kilter in my opinon, but this is the finished product.
Original
Enhanced
Hope you enjoyed my little tutorial and I hope it inspires new and creative MxO screenshot editing.